To get back into your account, follow the instructions we've sent to your email address.
Didn't receive the password reset email? Check your spam folder for an email from online@giant.sg.
We noticed that the quantity you are trying to add to your cart qualifies it as a bulk order.
Please note that for bulk orders:
Delivery may take up to 4 business days
We may not be able to deliver the full quantity you requested
An additional bulk delivery charge may apply for large/heavy items
If you would like to proceed with this bulk order, our team will contact you within one business day regarding product availability, expected delivery date, and any applicable delivery charges. You will only be invoiced based on the actual quantities delivered.
WE OPEN NEW SLOTS THROUGHOUT THE DAY, SO DO CHECK BACK REGULARLY TO SECURE ONE!
Please check your postal code coverage, choose the delivery slot before you shop and complete the payment within 45 minutes. We will release your delivery slot if you exceed the reservation time given.
DELIVERY
Please enter your postal code to check for an available slot. We’ll help keep your slot for the next hour so you can shop for what you need!
Sorry, currently there's no Home Delivery slot available
for your location. Please try again at a later time.
You can also try using our new Click & Collect option!
OR
CLICK & COLLECT
Self-collect at your preferred store (min. order $30).
CHOOSE STORE
*Order before 6pm to enjoy same-day click & collect
Address: . Collection Time:
WE OPEN NEW SLOTS THROUGHOUT THE DAY, SO DO CHECK BACK REGULARLY TO SECURE ONE!
Please check your postal code coverage, choose the delivery slot before you shop and complete the payment within 45 minutes. We will release your delivery slot if you exceeds the reservation time given.
Self-collect at your preferred store (min. order $30).
DELIVERY
CLICK & COLLECT
Sorry, currently there's no Home Delivery slot available
for your location. Please try again at a later time.
You can also try using our new Click & Collect option!
CHOOSE STORE
*Order before 6pm to enjoy same-day click & collect
10 Christmas Tree Ideas That Will Get You Merry In 2017
02 December 2017
Share
Did you know the first decorated Christmas tree dates back to the times of ancient Romans? It was during their winter festival that honoured the god of agriculture, Saturnus, that decorated trees complete with small pieces of hanging metal first appeared. Today, decorating the Christmas tree has become a much-cherished Christmas tradition and one that often involves the entire family.
In this post, we will look at 10 unique Christmas tree ideas for your family’s tree. From great themes for your tree to homemade ornaments and delicious edible tree ornaments, make 2016 the most personal and unique Christmas your home has ever seen! Before you get started, use this checklist to ensure you have all the essentials for your tree:
A Christmas tree
Tinsel
Ornaments
Strings of lights
Tree stand
Christmas Tree Decorating Ideas
Looking for fun, unique, and beautiful Christmas tree theme ideas? Here are 4 Christmas tree ideas to get you started.
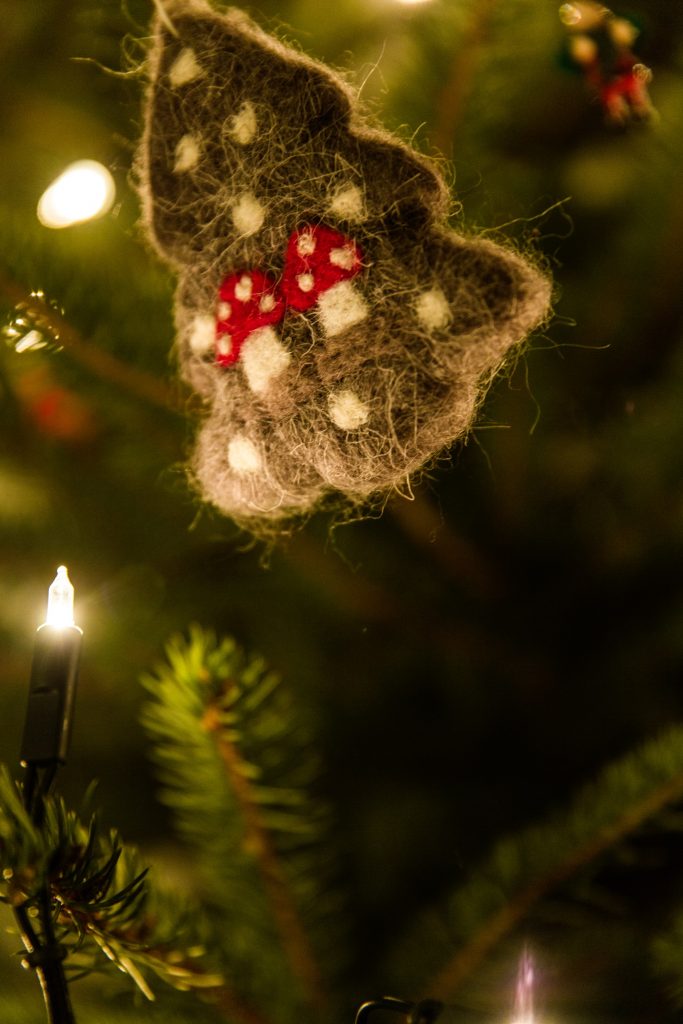
A variety of ornaments in different materials, such as ceramic, wood, metal, fabric, twine, twigs, and yarn
Woven basket for the base
Extra twine and plastic baubles
Marquee signs
Empty boxes
Festive wrapping paper and ribbon
Directions:
Place your Christmas tree in the woven basket and steady it
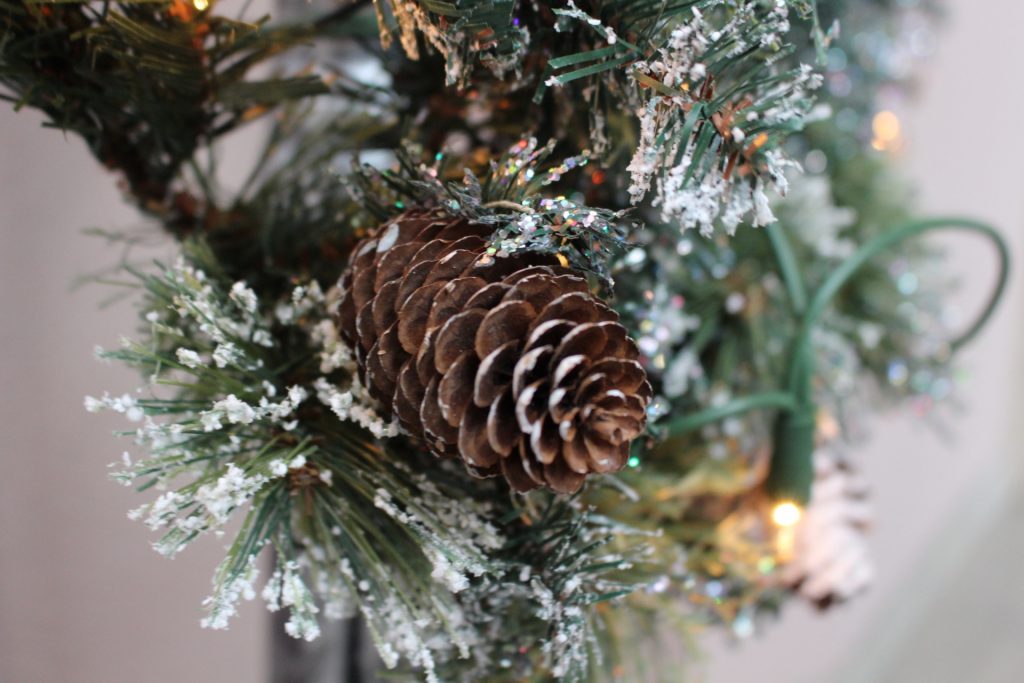
Use the snow spray to spray the top of the pinecones
Hang your variety of ornaments on your tree
Wrap a couple of empty boxes with festive paper and ribbon, and arrange around the tree
Use the marquee signs to spell out something festive, like “Noel” or “Xmas” and attach them to the tree by threading a branch through the back of the sign and bending it to loop. If you do decide to use the signs, it’s a good idea to tether the tree to the wall to prevent it from falling over.
Place twine and yarn in larger clear ornaments to create fun focal points and textures, and hang the ornaments on your tree
A large bucket to fit your tree in and red and white material to cover the bucket
A large red or white star for the top of the tree
Hot glue
Directions:
Plump up your Christmas tree and hang the lights, tinsel, and any other red and white decorations
Cover the bucket in red and white material using the hot glue
Put the star at the top of the tree
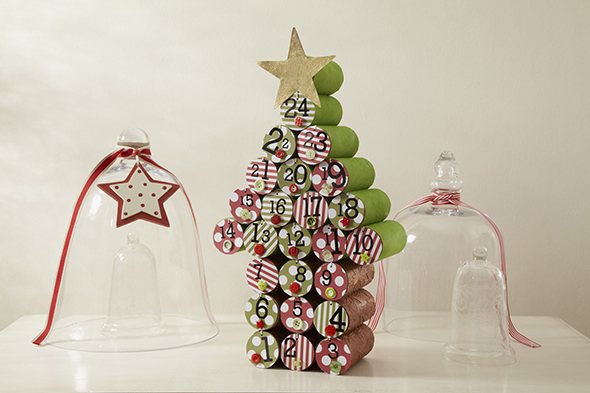
For the advent presents, wrap the boxes in plain white paper. Cut out the numbers 1 – 12 (or more for all the days of December if you want to) and glue the numbers to the boxes. You may want to place a small surprise in each box for each day of Christmas, but just make sure you can open and close the boxes easily!
Use more red cardboard to spell out “12 DAYS” and hang the letters on the tree using string or yarn
If you want unique Christmas tree decorating ideas, try this
rainbow tree this year!
You will need:
Christmas tree
String lights of varied colours and shapes
A variety of Christmas tree ornaments in different textures, shades, and styles
Snowflake ornaments
Different colours spray paint
Directions:
First string the lights around the Christmas tree
Use the spray paint to spray the tips of the tree and all the ornaments in the different colours of the rainbow
Fill the tree with ornaments, allowing the colours to overlap a little
Spray the snowflake ornaments in different colours and spread them around your tree
DIY Christmas Tree Ornament Ideas
Do you love a decorated Christmas tree but you’re tired of the same old ornaments you’ve had for decades? Here are two fun Christmas tree ideas for ornaments that will help you decorate a Christmas tree professionally.
These are
fun Christmas tree ideas for the whole family and you’ll love a remembrance of your little one’s thumbprints as they grow up!
You will need:
Variety of different colour baubles – choose colours that will fit in with your Christmas tree theme this year, or opt for standard colours you can use year after year
Finger paints suitable for the baubles
A couple of little thumbs!
A black sharpie
Directions:
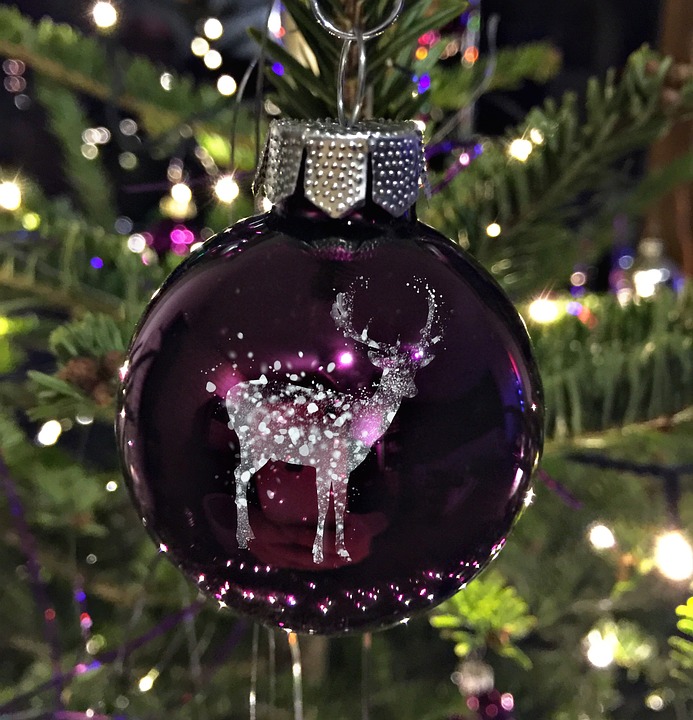
First put each person’s initials on their baubles and the date
Place paint on a thumb and press thumb onto the ornament
Once the thumbprints are dry, add eyes with the sharpie
Then add two lines for antlers and a “V” to fill them in
Add a red nose for Rudolph if you have a red sharpie or red craft paint and a small paint brush
Christmas Tree Baking Ideas
Our list of festive Christmas tree ideas would be incomplete without a couple of homemade, home-baked options.
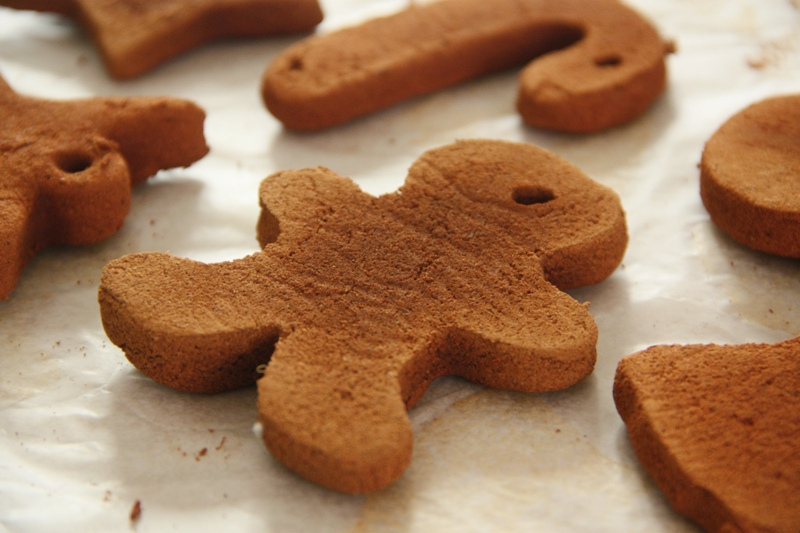
Combine all the ingredients together in a bowl and mix thoroughly.
Wash your hands and place the dough on a lightly floured surface. You may prefer to use wax paper which will stop the dough sticking to the counter. Knead the dough with dry hands. If you find that the dough is a little sticky, dust a little more flour on your hands and carry on kneading.
Roll the dough out and use festive cookie cutters to create beautiful, and tasty, cinnamon ornaments for your 2016 Christmas tree.
Pierce a hole in the ornaments and leave them to dry for about 24 hours.
Once dry, use the acrylic paints to decorate the ornaments, or hang them from your tree as is.
To make the clay, place all the ingredients in a pot over a medium heat and stir constantly. The mixture will start to thicken and form a mass.
The clay is ready when it looks like whipped mashed potatoes.
This mixture gets dry quickly, so be sure to take it straight off the heat as soon as it is ready. Place it in a bowl and cover the clay with a damp cloth to cool for about 10 – 15 minutes
For the handprint ornaments:
First, create a circle of clay about 1 centimetre thick. Avoid making it any thicker as it will crack easily. Make sure the round is big enough to fit your child’s hand. You can roll out the clay with a rolling pin and use a circular cookie cutter to get the right shape. Alternatively, just flatten the clay with a flat object like a dinner plate.
It’s a good idea to surround the clay with parchment paper or even wax paper to stop it from sticking to the surface and tools. This makes it easier to pull away without damaging the clay’s smooth surface.
Help your child to centre his or her hand on the round of clay and press the hand down firmly.
The handprint should be clear and easy to see. If needed, wet your hands slightly before rolling out the next round of clay to keep the mixture a little moist.
Once you are happy with the handprints, use the straw to create two holes at the top of the ornament that will be used to hand it. Remember not to put the holes too close to the edges.
Leave the clay to dry for a couple of days, turning it over regularly.
Now, it’s time to decorate your homemade ornaments! Some people prefer to leave them white, but others prefer to paint them and jazz them up with glitter. Try coating just the outside edges of the clay with glitter to really allow those handprints to shine. Just brush the glue onto a part of the ornament and sprinkle on the glitter, shaking off the excess.
If you want, once the ornament is completely dry you can spray it with a coat of Mod Podge or clear sealant to ensure the paint and glitter lasts for many years to come.
Thread the ribbon through the holes and tie the ends together to create your ready-to-be-hung ornament.
This recipe makes about 2 – 3 handprint ornaments, depending on the size of hands being used!
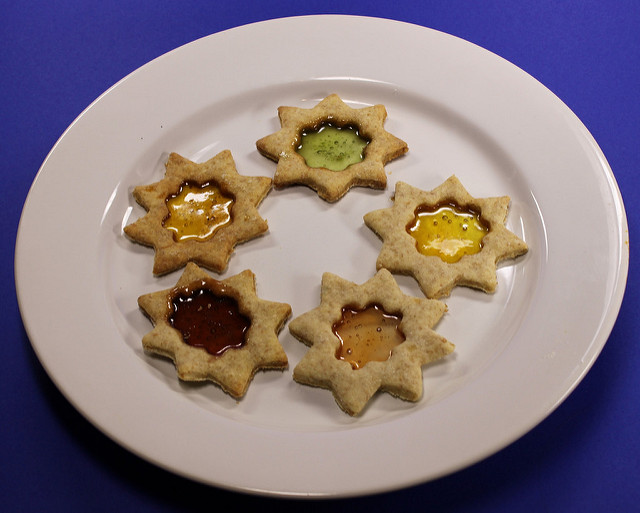
Give your hanging ornaments, and biscuits, a fun and tasty spin this year with these
stained-glass biscuits.
Ingredients:
1 medium egg
125g unsalted butter, soft
Pinch of salt
150g caster sugar
250g medium flour
A couple of drops of vanilla extract
Hard boiled sweets
2 cookie cutters of different sizes
String, ribbon, or thread for hanging biscuits on the Christmas tree
Directions:
Cream the salt, sugar, vanilla extract, and butter together until fluffy and light
Beat in the 1 egg and then add the flour. Continue mixing until the mixture comes together and firms up the dough. Leave the mixture in the refrigerator to cool.
Remove the dough from the refrigerator and roll it out on a floured surface.
Use the two biscuit cutters to cut out shapes. Place the smaller of the cutters in the center of the bigger shapes and carefully remove the center of the biscuit. Don’t leave any gaps in the edges of the biscuits – you don’t wait the sweets to spill over!
Place the biscuits on a piece of greaseproof paper, overlaying the edges. Make sure there aren’t any gaps in the areas where the sweets will go. If you want to hang the biscuits from your Christmas tree, pierce a hole in the dough using a cocktail stick or skewer.
Select your favourite coloured sweets and place them in the desired spaces in the biscuits.
Bake the decorations for between 8 to 10 minutes at 160 degrees Celsius. Keep a close eye on the biscuits as they need to be firm, but still lightly golden in colour. The sweets should be fully melted before you remove the biscuits from the oven.
Leave the biscuits to cool and then peel them away from the greaseproof paper.
Once the biscuits are completely cool, thread a piece of ribbon through the holes and hang them from your Christmas tree. Make sure a few of your fairy lights are well placed to shine through the stunning “stained glass.”
Begin making your decorations by cutting your Rice Krispy Squares in half. If you haven’t yet mixed the icing sugar with a couple of drops of water, do so now to create a thick paste. This is going to act as your glue for the decorations.
Place one half of a Rice Krispy Square on top of the other and sandwich them together using a thin layer of the icing.
While they set, roll out the green fondant to about half a centimetre thick, making sure the fondant is larger than the Rice Krispy Square stacks. Spread a thin layer of icing over the stack.
Carefully flip the fondant onto your stack and smooth it down around the square using your fingertips. Once you are happy with the result of the covering, trim off the rest of the fondant and repeat until all three presents are covered.
Cut a piece of ribbon for each present and tie it around the same way you would a normal square gift box and finish with a pretty bow.
Add the edible silver balls. You can stick them down using the icing sugar mixture. Alternatively, spray the gifts with gold edible spray for a rather elegant finish.
Leave the presents to dry before you hang them on your Christmas tree. You can place string on the ribbon to make it easier to hook to your Christmas tree.
Hope you enjoyed reading our 10 Christmas tree ideas to make your 2016 theme and decorations unique. There’s nothing more rewarding than getting the whole family involved in creating precious ornaments and edible delights that will last all through the festive season – and for years to come in the case of the ornaments. So grab everything you need (including your little ones!), remember your Christmas decoration checklist, and get creative!