Photo by: sboneham
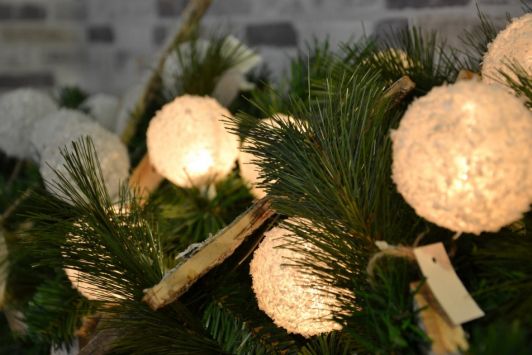
I’m dreaming of a green Christmas… The only snow we get this time of the year comes in the form of those packing Styrofoam balls when we open some of our gifts. Not surprisingly, with all that gift buying and parties, Christmas is one of those holidays where there is plenty of excess and wastage. In Singapore, we generate over 7.5 million tons of waste in a year – that’s the equivalent weight of 45 million reindeers. Crazy!
According to the National Environment Agency, over 10% goes to food, another 10% to plastics, and a whopping 1 million ton alone goes to paper. Let’s reduce the burden on our environment, starting this Christmas. We show you how with these 10 fun and affordable eco-friendly Christmas decorations you can make at home.
Some General Advice for an Eco-Friendly Christmas
Before you buy gifts, decorations, or food for your Christmas celebrations, stop and think. Do you really need to buy? What have you already got at home that can be repurposed? Here are some simple ways to celebrate an eco-friendly Christmas: Less is more when it comes to the holidays, so try to re-gift functional gifts to someone who has real use of them. Organise a round-robin gift exchange by doing a draw and have everyone give just one gift to an assigned person.
When buying gifts, avoid battery-operated items. Going homemade is the way to go as it shows your sincerity and thought, plus it is unique to boot. There are plenty of workshops and craft lessons these days. Think about the carbon footprint and buy local produce to reduce transportation. Going vegetarian, whether partially or fully, also helps. Support your local maker if they promote sustainability.
Lastly, wrap all those good gifts up using the Furoshiki method. The cloth can be reused and it eliminates the use of plastic tape and wrapping paper. To start the holiday atmosphere brewing and that green cause going, check out these 10 eco-friendly Christmas decorations:
1. Scrap Ribbon Tree Ornament
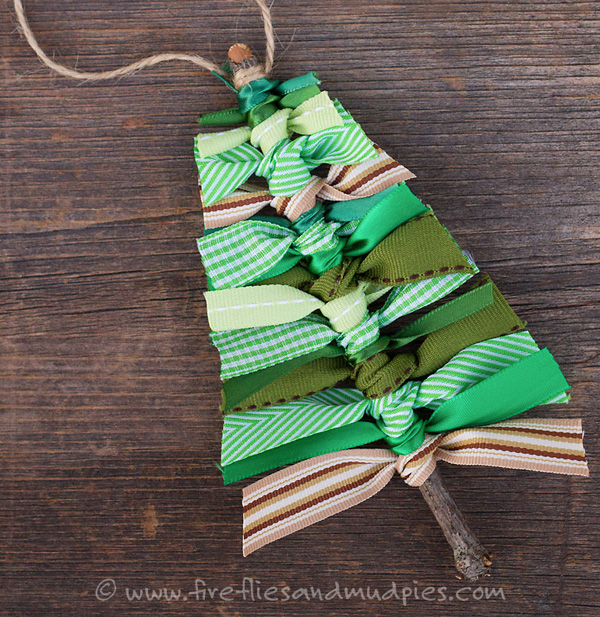 Photo and DIY idea by: www.firefliesandmudpies.com
Need a good reason for a walk other than Pokemon Go? Gather some straight fallen twigs from your nearby park and create these simple but beautiful tree decorations. Best of all, you’ll be able to use those beautiful ribbons scraps that are too short for wrapping but too beautiful to throw away! Make scented versions of these decorations by replacing the twigs with cinnamon sticks.Perfect way to be earth-friendly!
You’ll need
- Straight sticks (approx 6” in length)
- Ribbon scraps
- Twine
- Hot glue gun
- Scissors
- Cinnamon sticks (optional)
How to
- Tie the ribbon scraps around the twig. Line them up and bunch them together for the best effect.
- Trim the edges of the ribbon so that you have the shape of a tree.
- Use the hot glue to secure a twine loop to the top of the twig, or simply tie.
Price This costs next to nothing to make, but if you need to buy ribbons and twine that you don’t have around the house, it’ll be about $15 to make about twenty or more, which makes each ornament less than $1 each.
2. Salt Dough Decorations
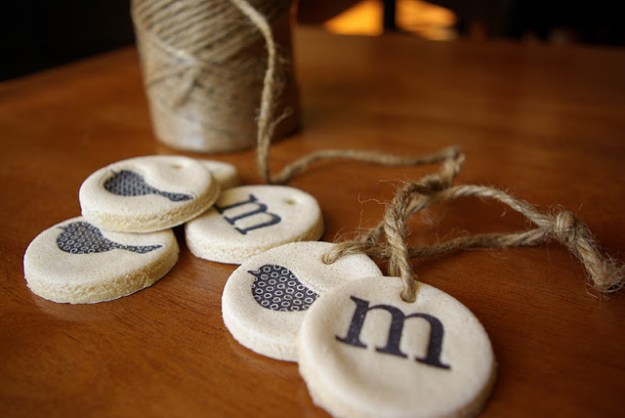
Photo and DIY idea by: www.oleanderandpalm.com
The best thing about these eco-friendly Christmas decorations is the fact that they are only limited by your imagination. Okay, and maybe your cookie cutters and rubber stamps. Cut out snowman, reindeers, or Santa, or customise them with stamped initials. Properly mixed salt dough does not crumble, and has a long shelf life when kept in an airtight container.
You’ll need
- Salt (1 cup)
- Flour (2 cups)
- Water (1 cup)
- Twine
- Rubber Stamps
- Cookie Cutters
- Baking parchment paper
- Drinking straw
How to
- Mix the salt, flour, and water in a mixer until it is a smooth dough.
- Roll the dough out between two pieces of the parchment paper till it’s about ¼” thick.
- Stamp your designs and cut them out using the cutters.
- Cut out the hole for the twine at the top with the drinking straw.
- Bake it in the oven at 120 degree celsius for about 3 hours to let the dough dry.
- Thread the twine through for your finished ornaments.
Price This will set you back $3 for over ten ornaments only, depending on your shapes and sizes. If you need to buy the rubber stamps and cookie cutters, these can go up to about $10.
3. Recycled Paper Christmas Decorations
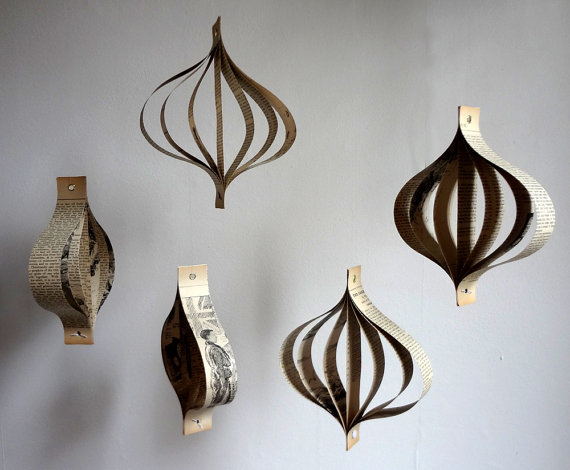
Photo and DIY idea by: Etsy (Bookity)
These hanging baubles are so easy and fast to make, and they are large enough to easily jazz up a corner of your space to welcome your holiday guests. Opt for a rustic design using pages from old books, or create festive designs using leftover wrapping paper or cardboard scraps you have around the house.
You’ll need
- Old book pages
- Stapler
- Ribbon, twine, or fishing line
- Hole puncher
How to
- Cut the paper into strips about 1.5” thick and with varying lengths about 5”, 6”, 7”, and 8”.
- Use the 5” strip as the middle and place two 6” strips by each side. Staple the top and bottom.
- Repeat with the 7” and 8” strips.
- Punch a hole at the top and thread the ribbon or line through.
Price Recycling the books cost nothing but if you wish to buy some fancier paper, preferably recycled, this can bump it up to about $5 for ten ornaments – still affordable.
4. Rustic Twig Candle Holders
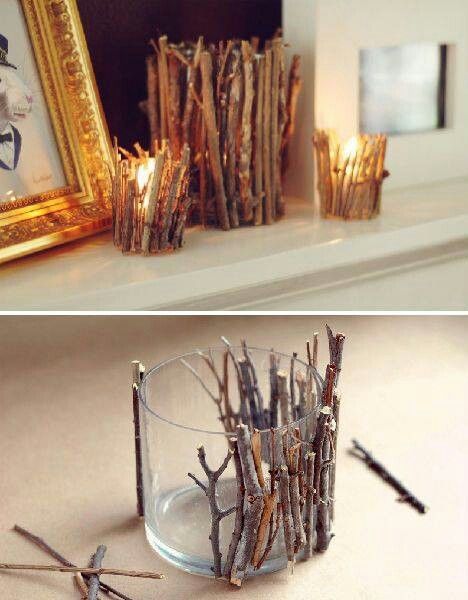
Photo and DIY idea by: www.foxhollowcottage.com
Lighting is everything when it comes to setting the mood, and twinkling candlelight offers a magical touch. If a Christmas pine tree is out of the question, you can still bring nature into your house with this twig candle holder alternative. Try dressing it up a little with ribbons.
You’ll need
- Sticks/twigs
- Glass cups or containers
- Glue
- Ribbon (optional)
How to
- Trim the sticks to just a little taller than the height of the cup. You can have it neatly trimmed or a little more loosely for that rustic feel.
- Apply the glue and stick the twigs around the cup.
- Finish with a ribbon if desired.
Price It costs $17 for a set of 6 cups and glue. If you already have glass cups lying around, these lighting decorations will cost you nothing except some calories spent walking around looking for the fallen sticks. The great thing about these is that you can use them in various settings by just swapping the ribbon.
5. Mood Lighting Cans
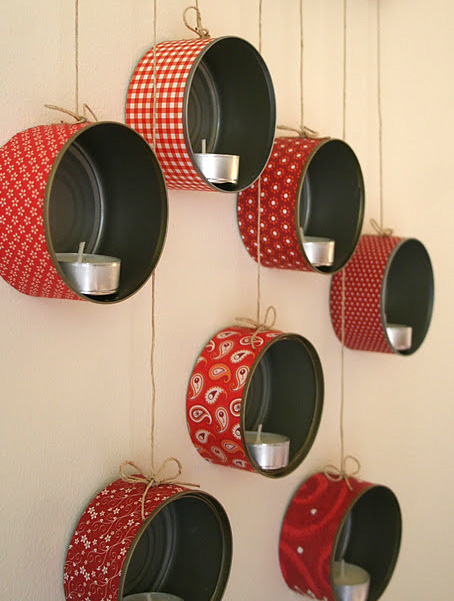
Photo and DIY idea by: www.kiflieslevendula.blogspot.sg
Still on lighting, these are a great addition to feature against a wall, especially if you’re a tune fiend! Pop in some tealights and you’ll have a warm cosy corner that uses recycled tins and their inner reflective surface to maximum effect.
You’ll need
How to
- Wrap the tins using the wrapping paper of your choice.
- Trim the ends if need be.
- If you’re using twine, tie it around the can and knot it at the top with excess for hanging.
- If using the velcro mounting tape, just affix one piece to the can and the other to the wall where you want it to be.
Price The cans are $4 for two and it comes with all that delicious fish. If you’re opting for the velcro mounting tape, this will bring a set of two to be about $8. If not, it’s only about $5. Remember to keep away flammable objects when installing this project.
6. Recycle Greeting Card Wreath
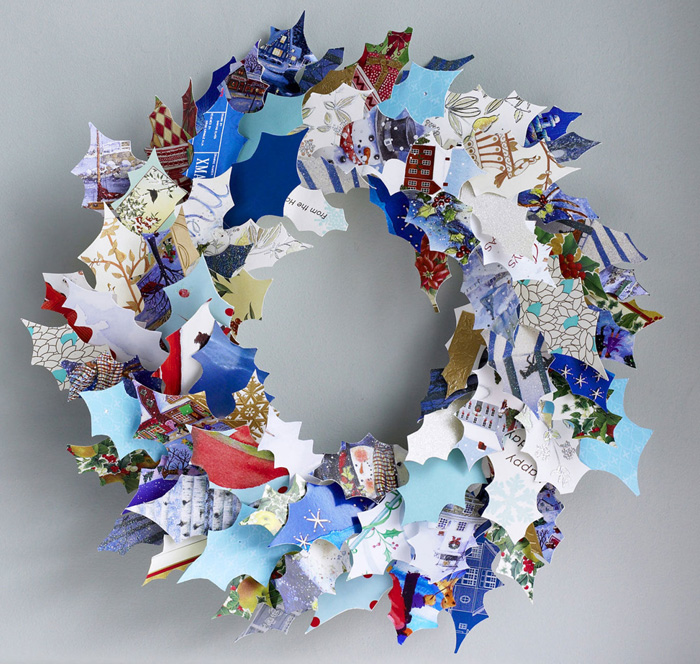
Photo and DIY idea by: www.goodhousekeeping.com
Wow visiting guests by making this impressive wreath out of recycled greeting cards and hanging it on your front door! This pretty yet eco-friendly Christmas decoration can be tweaked in size and colour depending on the type of cards you have and is really simple to assemble.
You’ll need
- 10” foam wreath
- Old greeting cards
- Toothpicks
- Hot glue gun
- Scissors
How to
- Cut the cards into a holly leaf shape as shown in the picture.
- Hot glue a toothpick to one end of the paper leaf.
- Poke these into the foam wreath until it is covered as shown.
Price A foam wreath costs about $17 and is available at craft stores. If you run out of greeting cards, try using pages from a magazine or even gift wrap as an alternative.
7. Recycled Bottle Christmas Tree
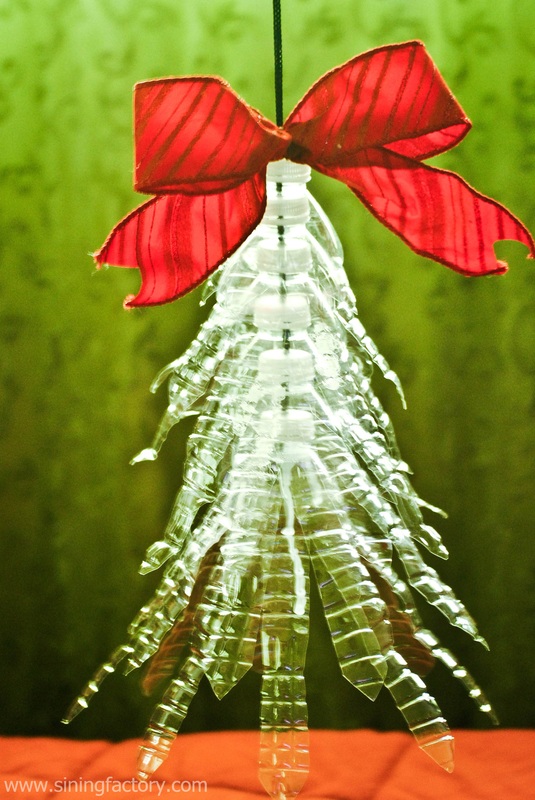
Photo and DIY idea by: www.siningfactory.com
What’s Christmas without the Christmas tree? But having an eco-friendly Christmas means not buying a huge synthetic tree that will just sit in the storeroom for months. So why not make your own, using common household items like plastic bottles?
You’ll need
How to
- Clean the bottles and remove the wrappers.
- Cut the bottles to varying lengths about 1” apart.
- Cut each bottle from bottom to top into 8 strips (or more if you wish) up to an inch or two from the bottle cap.
- Drill a hole through the caps.
- Tie a large knot at one end of your twine and thread it through the caps and bottles.
- Finish with ribbon if you wish.
Price We really recommend using recycled bottles instead of buying new ones. But if you need to, then 6 large bottle trees cost just $15.10. If you are electrically-savvy, attach a light at the end for a glowing Christmas decor!
8. Old CDs Christmas Baubles
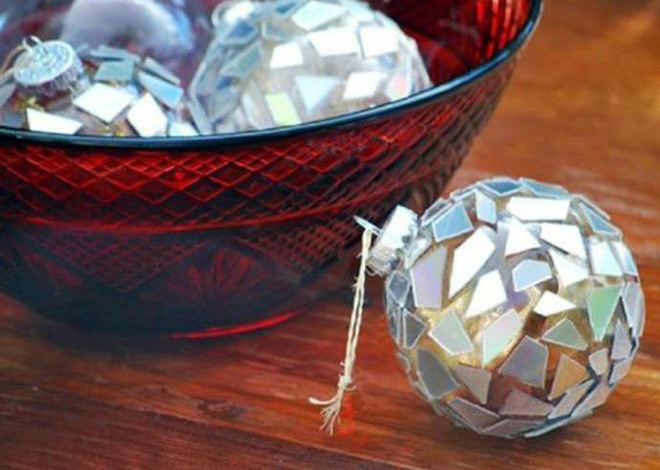
Photo and DIY idea by: www.jarty.net
Who would guess that these sparkly mosaic baubles are made from old CDs? The ubiquitous CD is now slowly being phased out, both musically and for storage. CDs take forever to decompose, so instead of trashing them, use your old CDs to create these disco ball-like decorations!
You’ll need
- Old CDs
- Clear plastic baubles
- Hot glue gun
- Scissors
How to
- Cut the CDs up into small random pieces.
- Hot glue the pieces onto the clear baubles.
Price The clear baubles can be bought at most art stores and will cost between $1-$3 each, depending on the size and quality. Buy in bulk to get a cheaper price. Alternatively, freshen up the look of some of your own old baubles with this same technique.
9. Christmas Pomander Arrangement

Photo and DIY idea by: www.lushome.com
The nose knows when a celebration is in full swing, so spice up the house with this fresh and natural scent-sation! The spicy heady aroma will be a hit with your guests!
You’ll need
- Oranges (4)
- Cloves (Varies)
- Fresh rosemary sprigs
- Pomegranate (Optional)
- Glass container
How to
- Poke the cloves into the oranges in a pattern you prefer.
- Arrange the oranges on top of the pile of pomegranate seeds.
- Insert the fresh rosemary.
Price This refreshing display will last a few days or up to a week in some conditions. The aroma will fill the house for an inviting welcome at just $12. If you prefer to keep things a little less messy, replace the pomegranate with some whole apples to prop up the arrangement.
10. Glowing Cardboard City Scene

Photo and DIY idea by: www.inhabitat.com
Cardboard boxes can be repurposed into an enchanting city scene with just some scissors and online cityscape references. The boxes also double up to hide those unsightly Christmas lights wires – yay!
You’ll need
- Cardboard
- Scissors
- LED string lights
- Paint (Optional)
How to
- Draw a city silhouette scene on your extra cardboard. You can refer to examples of cityscapes online.
- Make sure to cut out some windows for an added dimension to the scene.
- Paint the cardboard if you wish.
- Fold the cardboard at various points to allow it to stand and create depth.
- Place at your desired spot and put the Christmas LED lights behind.
Price It’s funny how something so simple can be done with spare materials around the house. This project costs next to nothing but will definitely give a unique glow at your upcoming party. Stay on the nice list with not just Santa, but Mother Gaia too with our easy and eco-friendly decoration ideas for a green Christmas. And always remember – refuse, reduce, reuse, recycle.