It’s no secret that kids love Christmas – Santa Claus, the Christmas tree, candy canes, and gifts galore! The toys may be used and forgotten and the new games may break, but it’s the activities you do together that become cherished Christmas memories.
Check out these 10 easy and cheap DIY Christmas craft ideas for kids to make and will also help you spend more fun time with your kids! This weekend, gather these materials together with your special little one and make something you’ll both be proud to display this season!
1. The Christmas Ball
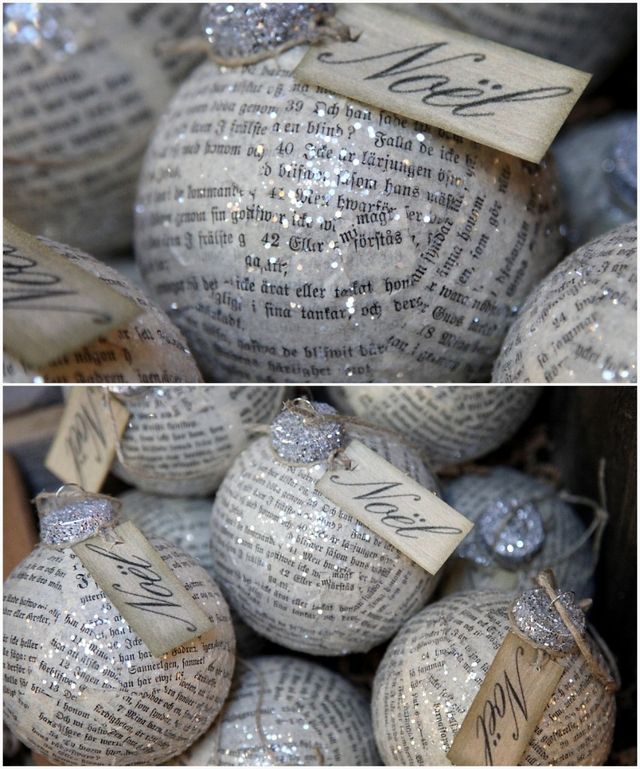
Photo By: Kinassaueur Style
These gorgeous Christmas ornaments can be made by children 10 years and older with some direction, and little ones will enjoy helping out. Who doesn’t appreciate some Christmas sparkle?
You need:
- Plain glass ornaments – you can buy new ones or use older, worn-out ornaments – or use Styrofoam balls for younger kids
- Mod Podge or similar decoupage glue – be sure it’s non-toxic if you have glue-eaters at home!
- Torn pages from old books
- Glitter or spray glitter
- Empty egg carton or original packaging for ornaments
Directions:
- If using glass balls, clean thoroughly with soap and water. Pat dry.
- Coat the Styrofoam ball with a layer of Mod Podge. Place the ball in the empty egg carton.
- Take pages from an old, worn out book, and rip them free. Ensure that little ones know we only do this with books that are too worn out to use anymore!
- If the pages are very thick, dampen them with a bit of water so that they are flexible before proceeding to the next step.
- Coat one side of the page with a thin layer of Mod Podge.
- Smooth the page onto the ball, glue-side-down, folding the page over as necessary.
- Repeat until the entire ball is covered with paper and lays smooth and flat.
- Add another layer of Mod Podge if necessary.
- Sprinkle glitter over your ornament! If you’re using spray glitter, be sure to let the Mod Podge dry thoroughly, first.
Time and Money: The cost of this project ranges from $8 – $15, depending on whether you re-purpose materials or buy everything new. Making the ornaments takes about 5 minutes each, but you and your child may have to wait in between coats of decoupage. Plan a movie or some other quiet activity for your child while waiting.
2. Wrapping Paper Christmas Tree Ornaments
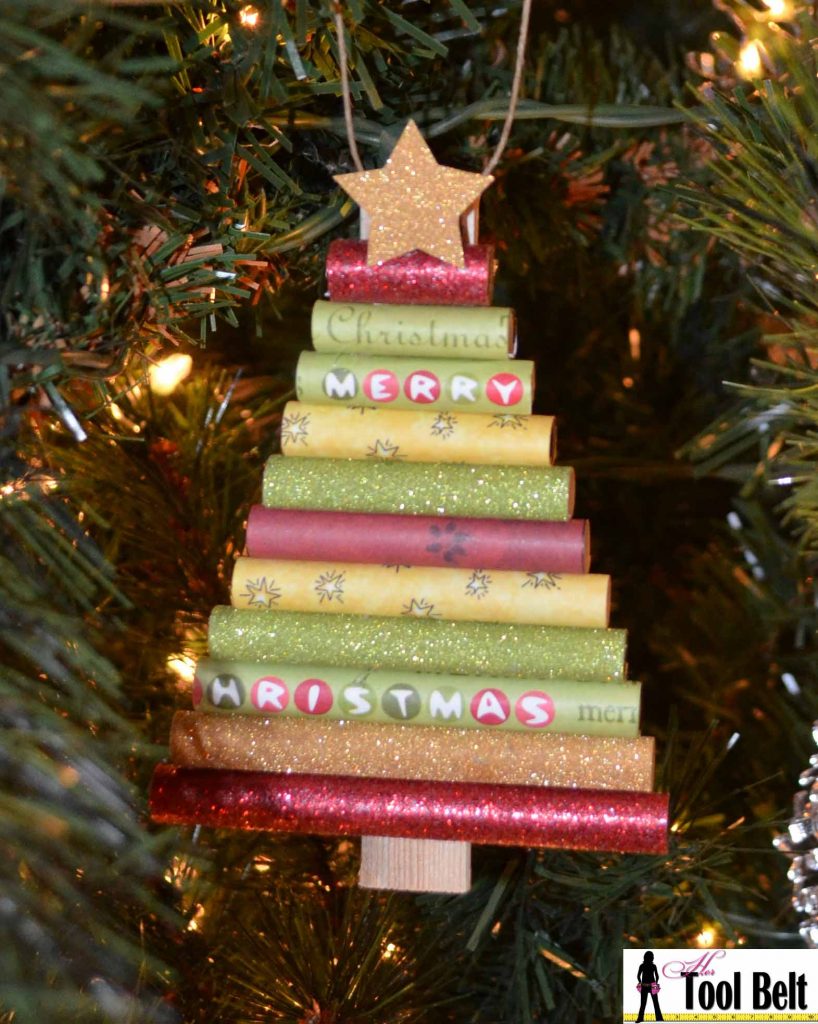
Photo By: Her Tool Belt
This is an easy Christmas craft for kids of all ages. Older kids will love decorating their trees to show off their art skills, but even the youngest will be able to help out. Best of all, this is a very inexpensive craft you can make from materials you have at home right now.
You need:
- Scrapbook paper or wrapping paper
- Tape
- String
- Pencils
- Popsicle sticks, disposable wooden chopsticks, or a cinnamon stick to make the tree trunk
- Scissors
- Scrap paper
- A ruler
- String
- Stickers, sequins, and other small odds and ends
Directions:
- Firmly tie a piece of string around the top of your ‘tree trunk’.
- Lay your ‘tree trunk’ down on a sheet of paper.
- Sketch a basic Christmas-tree shape on the paper. The total size of your tree should not be taller than your ‘tree trunk’, so that it can be seen from the bottom of the tree.
- Draw a horizontal line every cm up your tree. Then, measure each segment’s length.
- Measure and cut out 5.5-cm (length) strips of your scrapbook or wrapping paper. Make the width of each segment correspond to the width of your tree.
- Roll these pieces of paper around your pencil. Secure with tape or glue.
- Line rolls up from longest to shortest. Glue or tape them to your ‘tree trunk’ and to each other. Be sure to leave a bit of ‘trunk’ sticking out of the bottom so you can see it!
- Cut out a star or use a sticker-star for the top of the tree. You can use sequins or buttons and glue them on as ornaments!
Time and Money: These are very easy Christmas crafts for kids to make, and very inexpensive. Everyone has scraps of wrapping paper lying around during the holiday season! If you need to purchase cinnamon sticks and sequins this project could cost a grand total of $2.50. They don’t take very long to make, either: 15 – 20 minutes if you’re measuring and being exact. They only take about 5 minutes if you are confident enough to cut without measuring!
3. Orange Slice Ornaments
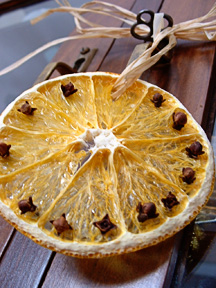
Photo by: Chatelaine
Not only are these pretty and old-fashioned, your kids will love the way they make the house smell! These are very easy Christmas crafts for kids to make at home. Any child old enough to use a knife in the kitchen is old enough to make these on their own as gifts for friends or family.
You need:
Directions:
- Cut the orange into slices about 1/2-cm thick.
- Lay the oranges on a baking sheet with your oven on the lowest setting. Leave until completely dry (this may be a few hours).
- Use cloves to poke holes around the outside edge of each slice.
- Loop your string or ribbon between the pulp and the rind, and tie into a bow.
Time and Money: This is another project with very little active work, but some serious waiting time. For smaller children, handle the cutting and oven on your own, but let them decorate with cloves, thread the ribbon and tie the bows. Give them final say on where they should be hung as well! These would look beautiful around a fireplace, on your Christmas tree, or hanging over doorknobs. The cost is $4 – $5.
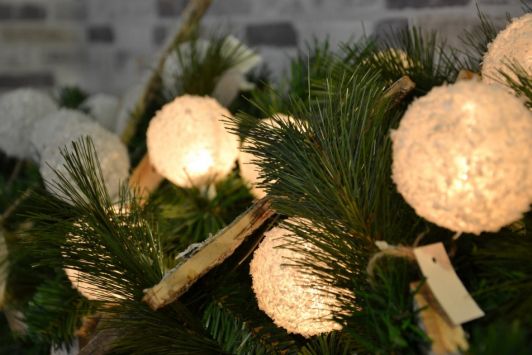
4. Bubblegum Ornaments
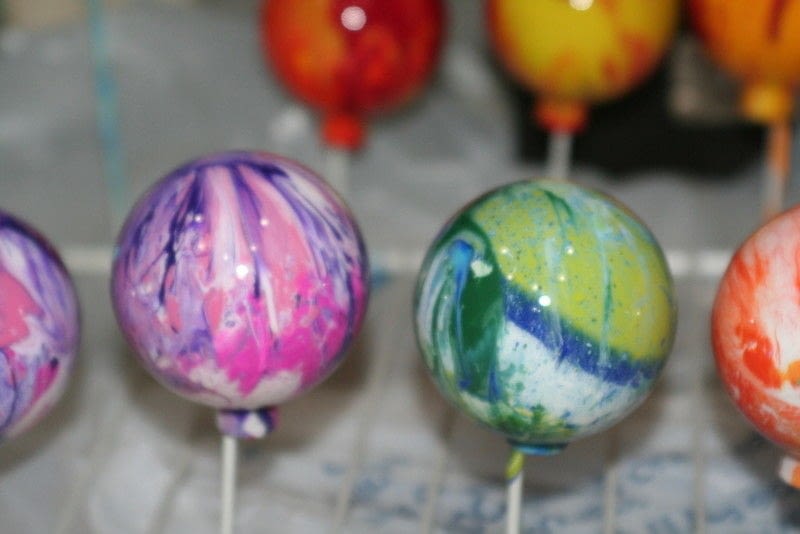
Photo By: Cut Out + Keep
These gorgeous ornaments may look like the work of a skilled artist, but they could very well be the work of a five-year-old. That can be your little secret! These colourful Christmas crafts are the perfect marriage of ‘easy’ and ‘impressive’.
You need:
- Glass ornaments
- Acrylic paint
- Empty egg carton or original packaging for ornaments
Directions:
- First, clean the ornaments inside and out, using soap and water.
- Remove the top of the ornament. Pick a few favourite colours of paint and drip three or four drops into the opening. If your child is little or has a heavy hand, ask him or her to pick the colours, but drop the paint in, yourself. Too much paint means that these will dry very slowly.
- Tilt the ornament gently, letting the paint flow whichever way it likes. Keep doing this until the entire inside of the ornament is covered in paint.
- Don’t rush it! If the paint is moving slowly, set your ornament back down in its packaging and wait for the paint to ‘catch up’. We suggest working on a few ornaments at the same time. -By the time you set one down, you’re ready to pick up the next!
- If your paint has really gone as far as it can, put in two more drops, but don’t overdo it!
- When the inside is well-covered with paint, turn them upside down and set them in their original containers to dry.
Time and Money: This is a more expensive craft if you purchase several glass balls, but the final product can be very inexpensive individually: about $1.50 an ornament! This would make a great Christmas craft for older kids who want something they can make as a gift.
5. Christmas Candies Lawn Ornaments
These Christmas lawn goodies are easy and fun for kids. They are also cheap and easy Christmas crafts for kids to make at school. They would look just great as part of a classroom display! Give your little artists a candy on which to model their painting… and when they’re done, they get to eat it!
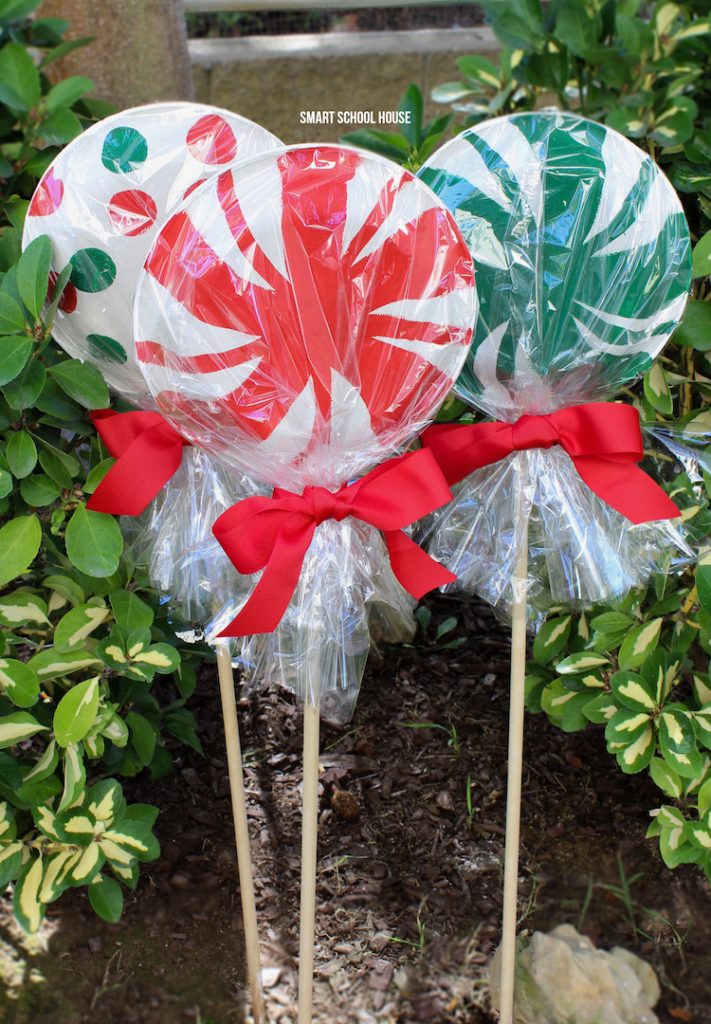
Photo by: Smart School House
You need:
Directions:
- If working with young children, always lay out a garbage bag or plastic tablecloth before they start to paint!
- Paint candy designs like the ones in the image of the paper plates. For each design, paint two plates with the same basic design. Let your plates dry fully before moving on to the next step.
- Cut two very tiny squares out of the bottom of the plates.
- Glue the edges of two plates together to create a three-dimensional candy, making sure you line up the tiny squares. Wait for the glue to dry.
- Slide the wooden dowel through the hole.
- Wrap the candy in cellophane or cling-wrap and tie to the dowel with a big red ribbon.
- Stick into the ground outside, or create an indoor display!
Time and Money: This project can be completed in stages, with activities in between the glue or paint drying. If you’re doing this project from home, plan on spending a few hours with craft materials out! This project can range in price depending on whether you have garden stakes you can use, and leftover paint.
6. Balloon Christmas Lights

Photo by: Living Locurto
You need:
Directions:
- Blow up your balloons!
- Cut a 25-cm length of green ribbon and tie one end to a balloon.
- Using the scissors, punch a hole through the bottom of the cups (an adult should do this!)
- Thread the other end of the ribbon through the cup, and pull the string through the hole.
- Do this with as many balloons and cups as you like!
- To create the garland effect, tie each balloon to a longer string and hang where desired.
Note: this project is easy to adapt to make oversized ornaments instead of lights: simply tie a bow around the cup and tape or glue in place. Use a pipe cleaner to create an oversized hook, and thread that through the cup instead of ribbon, like so: Time and Money: Quick and cheap, this project takes no more than 15 minutes to make, and costs less than $4 to create an impressive garland of balloon ‘lights’!
7. Sock Snowmen
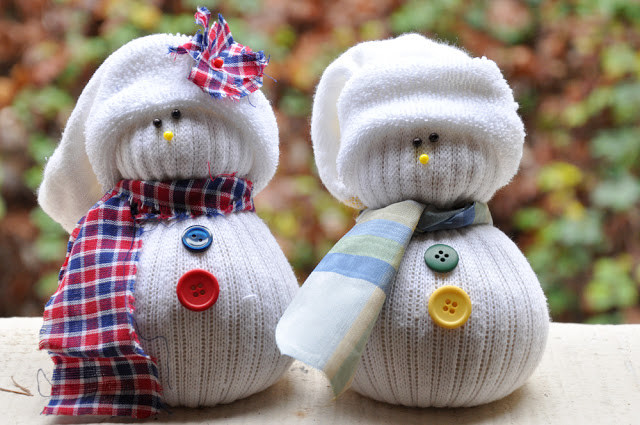
Photo By: Darkroom and Dearly
These cuties are made from items you may already have in the house and are super-easy to make. Everyone has that stray sock with no partner: never has there been a better use for it! A child six or older should be able to make one of these snowmen with help, and older kids will enjoy coming up with accessories to use. The sock snowmen would look charming on a mantle or before a fire and would make a great accessory for a laundry room or child’s bedroom.
You need:
Directions:
- Cut the foot of the sock away from the rest.
- Turn the leg of the sock inside-out.
- Attach a rubber band tightly around the open end. Now, turn right-side out again.
- Fill the sock with the uncooked rice. Pack it in nice and tight! The sock should be filled about 2/3 of the way up.
- Tie a rubber band so that you cordon off the bottom ball of the snowman.
- Fill the sock with rice again until the sock is filled almost all the way up.
- Tie another rubber band so that you cordon off a second ‘ball’.
- Now decorate! Use pins for the eyes and nose. Glue or stitch buttons down the front. Tie a strip of cloth around the ‘neck’ as a scarf to hide the rubber-band.
- Use the foot part of the sock to make a little cap. First, fold the edge over once or twice to hide any threads. Then pull over the top of the snowman to hide the top rubber-band.
Time and Money: The rubber bands and bag of rice could cost as much as $7.50, but this presumes you have no rubber bands or rice at home! This can be made in 5 to 20 minutes, depending on how fancy and detailed you want to make your sock snowman.
8. Salt Dough Ornaments

Photo By: Wholefully
Salt dough ornaments are a traditional favourite. You can decorate them using rubber stamps, paint them, or add glue glitter or other decorations on them once they are baked! Get the printable version of recipe from Publix.
You need:
- 1 cup flour
- 1/2 cup salt
- 1/2 cup warm water
- Parchment paper
- Cookie cutters
- Plastic drinking straw
- Rolling pin
- String or thin ribbon
- Optional: decorative stamps, glitter, acrylic paint, paint markers
Directions:
- Combine the dry ingredients and then add the warm water. Knead until smooth.
- Roll the dough on parchment paper until it is about 1/2-cm thick.
- Use cookie cutters to cut out shapes. If you have stamps, now is the time to create patterns in your cookies!
- Use a plastic drinking straw to make a hole at the top of each ornament.
- Bake at 120 degree Celsius for 2 to 2 1/2 hours, or until the centre of your ornaments are hard and dry.
- Once the decorations are cool, decorate. Then, loop string or ribbon through the holes and hang your ornaments!
Time and Money: It costs between $7 and $10 to make these ornaments if you have to purchase all the ingredients. If you also purchase the rolling pin, cookie cutters, and parchment paper, this project will cost about $20. Making the dough and getting the ornaments ready for the oven takes about 45 minutes, and decoration time may take about the same amount of time again. This is a project for a long, lazy afternoon! Note: these are not delicious! Be sure your little one knows you are making ornaments, not cookies. Calling it ‘clay’ instead of ‘dough’ may help!
9. Paper Chain Countdown Snowman
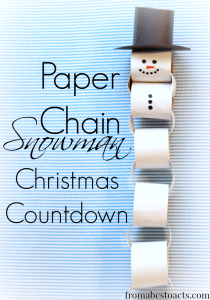
Photo By: From ABCs to ACTs
This is a great project to try with younger kids up to age 8 or 9. It allows you to stave off the “are we there, yet?” anticipation of Christmas, helps teach counting to little ones, and can be tweaked so that it is also a fond source of Christmas memories. Read on to learn how!
You need:
- Black and White construction paper (or any stiff paper)
- 2 small, cardboard tubes (such as toilet paper tubes)
- Coloured markers
- Tape or glue
- Imagination!
Directions:
- Cut each cardboard tube in half. Then, cut lengthwise to open them up.
- Cover one of your cardboard tube halves with black construction paper and secure using tape or glue. Cover the others with white construction paper.
- Cut out a circle of black construction paper and combine with your black tube to make a top hat!
- Attach your three white rings together as you would a paper chain.
- Draw a face on the front of your topmost white ring, and attach your top hat with tape or glue.
- Now comes the fun part! Count down the days to Christmas by creating a new link out of white construction paper for each day until Christmas. Remove one every day!
- A fun add-on is to write something you love about Christmas on the inside of each ring in pencil. You can write half, and your child can write half, so that each day you read something new! You can vary this idea by writing things you love about each other, favourite moments from the past year, or whatever is fun and age-appropriate for your child!
Time and Money: This craft costs just a few dollars to make, presuming that all you have to purchase is construction paper. This can be a very quick craft (15 minutes) or a long one if you decide to use the ‘memories’ idea.
10. Rose and Candy Cane Centrepieces

Photo By: Katie Brown Home Workshop
These centrepieces are so easy to create and so beautiful that kids will glow with pride when guests assume you made them!
You need:
- Red ribbon
- Large rubber band
- Flowers (red or white roses or carnations)
- A squat, cylindrical vase
Directions:
- Wrap a rubber band around the vase.
- Slide a candy cane between the rubber band and the vase. Keep doing so until there are candy canes all the way around.
- Use the ribbon to cover up the rubber band and tie a bow.
- Cut flowers so that they are only a bit taller than the vase.
- Add water to the vase and arrange the flowers.
Time and Money: This is a quick and simple project, and a great way to keep kids busy during that crucial 20 minutes before guests arrive for a party! This project would take an adult 10-15 minutes to complete. The cost varies: if you already have a vase and rubber bands at home, a pretty spool of ribbon may just cost you a dollar or two. Flowers can be expensive, but if you search around, you can find a pretty bouquet for $10, bringing the total project cost to about $12.
We hope you and your little ones enjoy these ten easy crafts this Christmas!